-
Phone Number
-
Email Address
- Free Consultation
Hosting on Ubuntu Linux 20.04
A Step by Step guide to creating Worker Service and Install on Linux
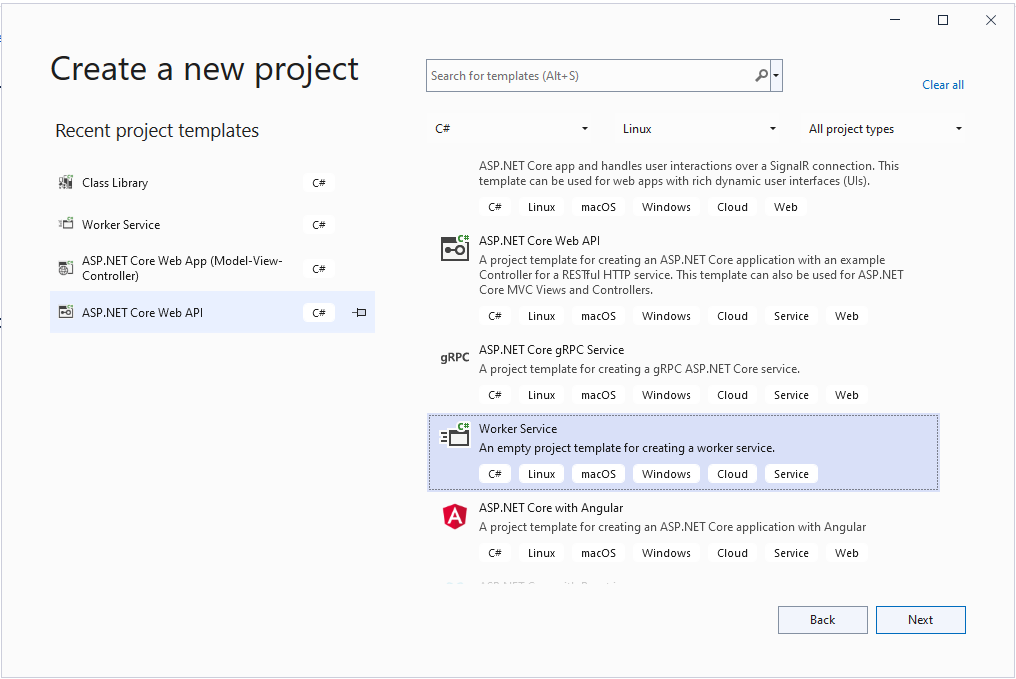
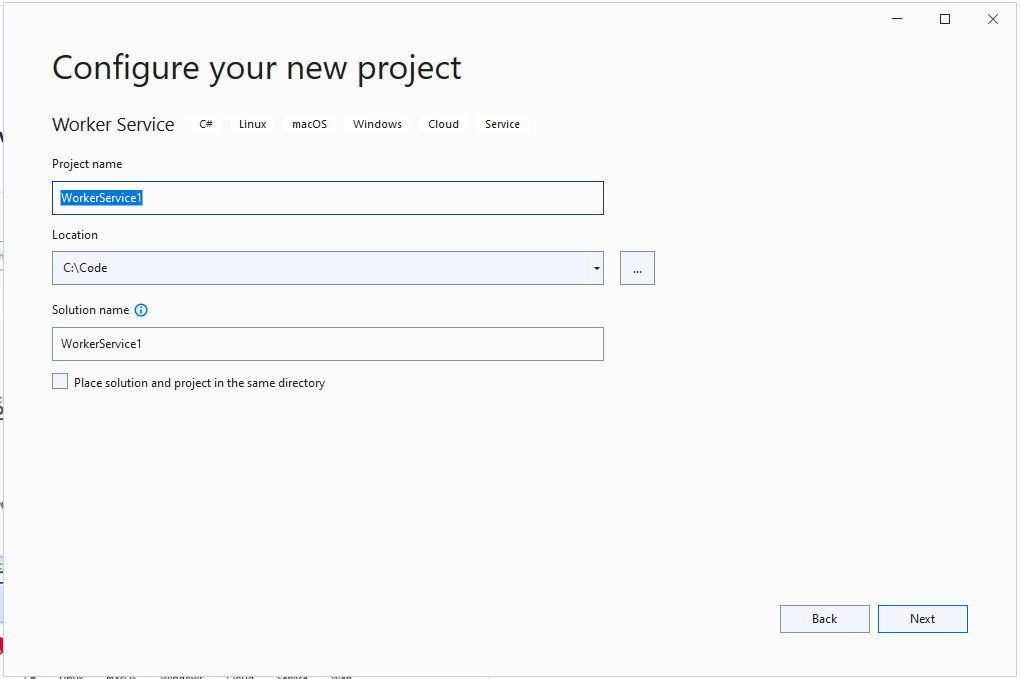
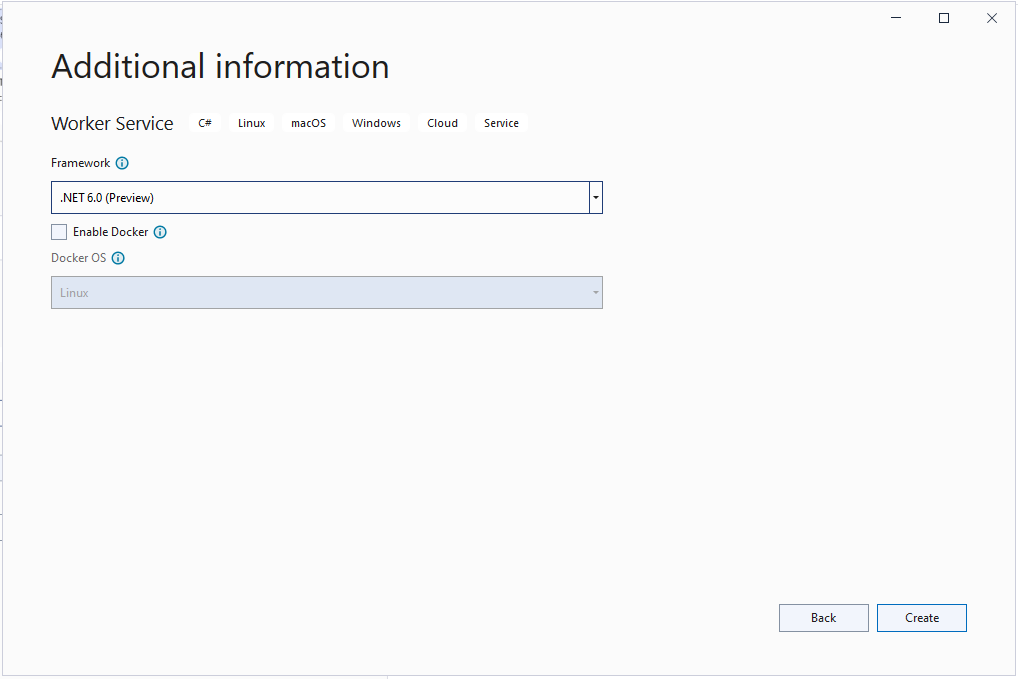
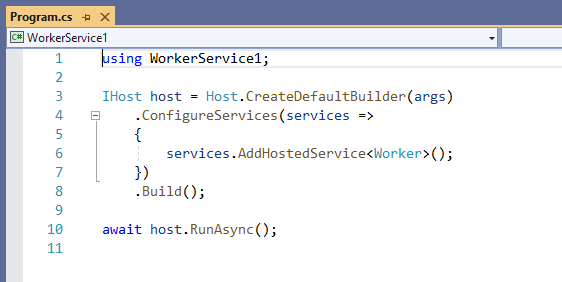
The Host is responsible for application startup and lifetime management. CreateDefaultBuilder creates this runtime host to run the application. CreateDefaultBuilder does a few things: configuring Kestrel server, setting the root directory, load app configuration (appsettings.json, appsettings. {Environment}.json), and configuring logging.
You have to install Microsoft.Extensions.Hosting.WindowsServices NuGet package. Add the UseWindowsService() call to the host builder.

You have to install Microsoft.Extensions.Hosting.Systemd NuGet package.

This is the background worker which does the actual job.
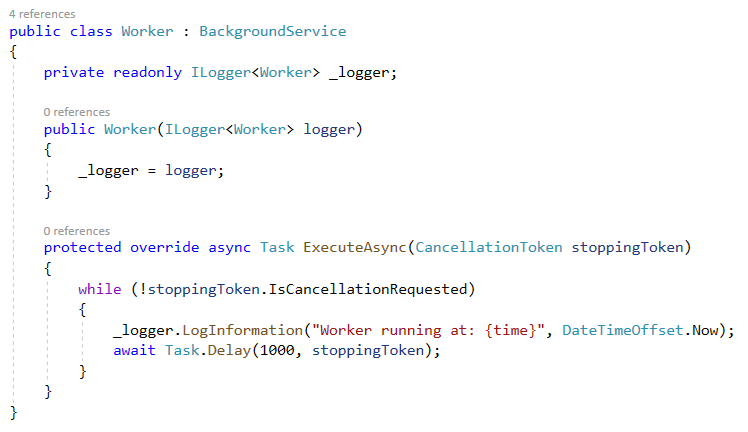
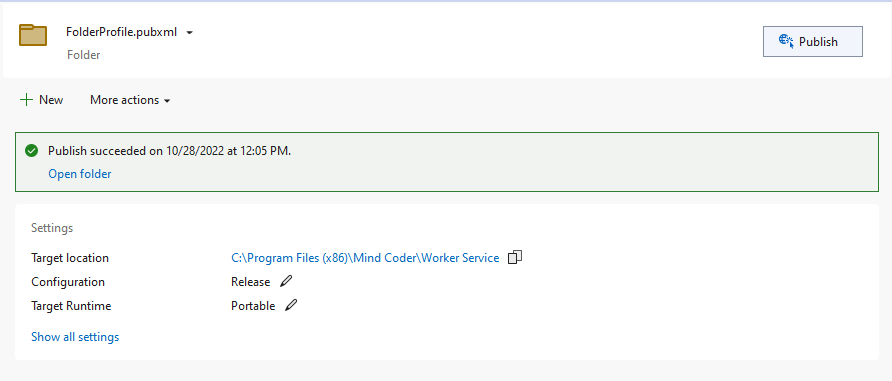
Create a folder under your user directory. Here devadmin is my username. (We can't directly copy Service to Publish folder due to permission denied. So, we have to copy it into this folder and then we will copy it to publish folder)
sudo mkdir -p /home/devadmin/workerservice
mkdir -p command
With the help of mkdir -p command, you can create subdirectories of a directory. It will create a parent directory first if it doesn’t exist. But if it already exists, then it will not print an error message and will move further to create sub-directories. https://www.javatpoint.com/linux-mkdir-p
In this step, we are going to copy that folder to Linux Virtual Machine for doing that we are going to use WinSCP. URL to Download WinSCP: – https://winscp.net/eng/index.php
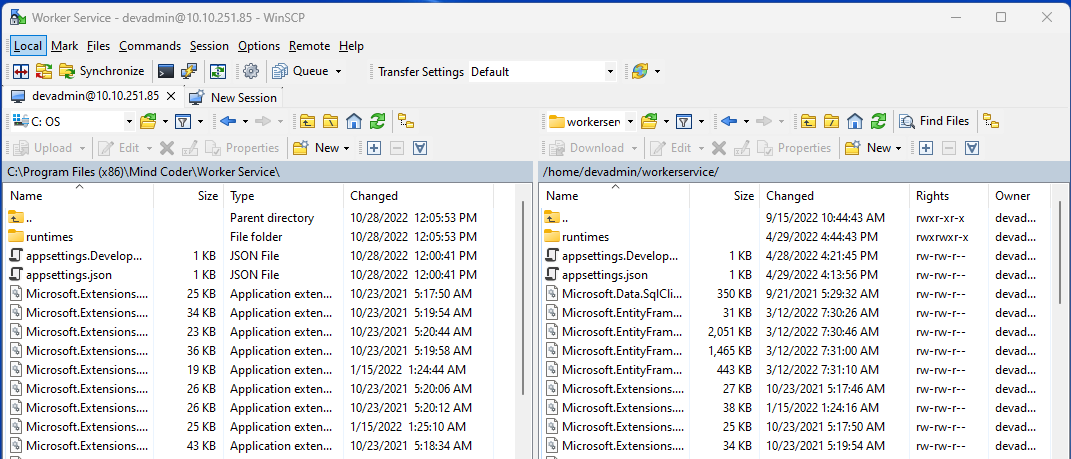
sudo mkdir -p /opt/workerservice
sudo cp -r /home/devadmin/workerservice/ /opt/
cp -r command
Option ‘r’ with the copy command can be used to copy a directory including all its content from a source directory to the destination directory. https://www.javatpoint.com/linux-cp-r
sudo nano /etc/systemd/system/workerservice.service
and edit its content with the following content to it
[Unit]
Description=Try-Catch Lab Worker Service
[Service]
Type=notify
WorkingDirectory=/opt/workerservice
ExecStart=/usr/bin/dotnet /opt/workerservice/WorkerService.dll
Environment=ASPNETCORE_ENVIRONMENT=Production
[Install]
WantedBy=multi-user.target
Then press Ctrl + s to save its content and press Ctrl + x to jump back to the normal window.
This will pick up the new file and allow you to start and stop the service.
sudo systemctl daemon-reload
Start the services manually.
sudo systemctl start workerservice
View status of the service
sudo systemctl status workerservice
Stop the service
sudo systemctl stop workerservice
Enable service to it runs on boot
sudo systemctl enable workerservice
Disable service to it runs on boot
sudo systemctl disable workerservice
Examine the Logs
This will allow for the logs to be viewed for the service.
sudo journalctl -u workerservice
The Logs levels on the .NETCore side will match the Systemd logging levels as this
| Log Level | Syslog Level | systemd name |
|---|---|---|
| Trace/Debug | 7 | debug |
| Information | 6 | info |
| Warning | 4 | warning |
| Error | 3 | err |
| Critical | 1 | critical |
so look at only critical entries you can go
sudo journalctl -p 3 -u workerservice